Some features of the BLINC are not compatible with the HAVOC HPA Engine included in the Gen-12 MTW Shotgun including the built-in chronograph, random sampling, and dwell autotune. Additionally, dwell tuning is currently only available via the Wolverine Airsoft app. Check out this video for more information.
Install the bushing into the end of the barrel. Don’t tighten it all the way until the gun is fully assembled.
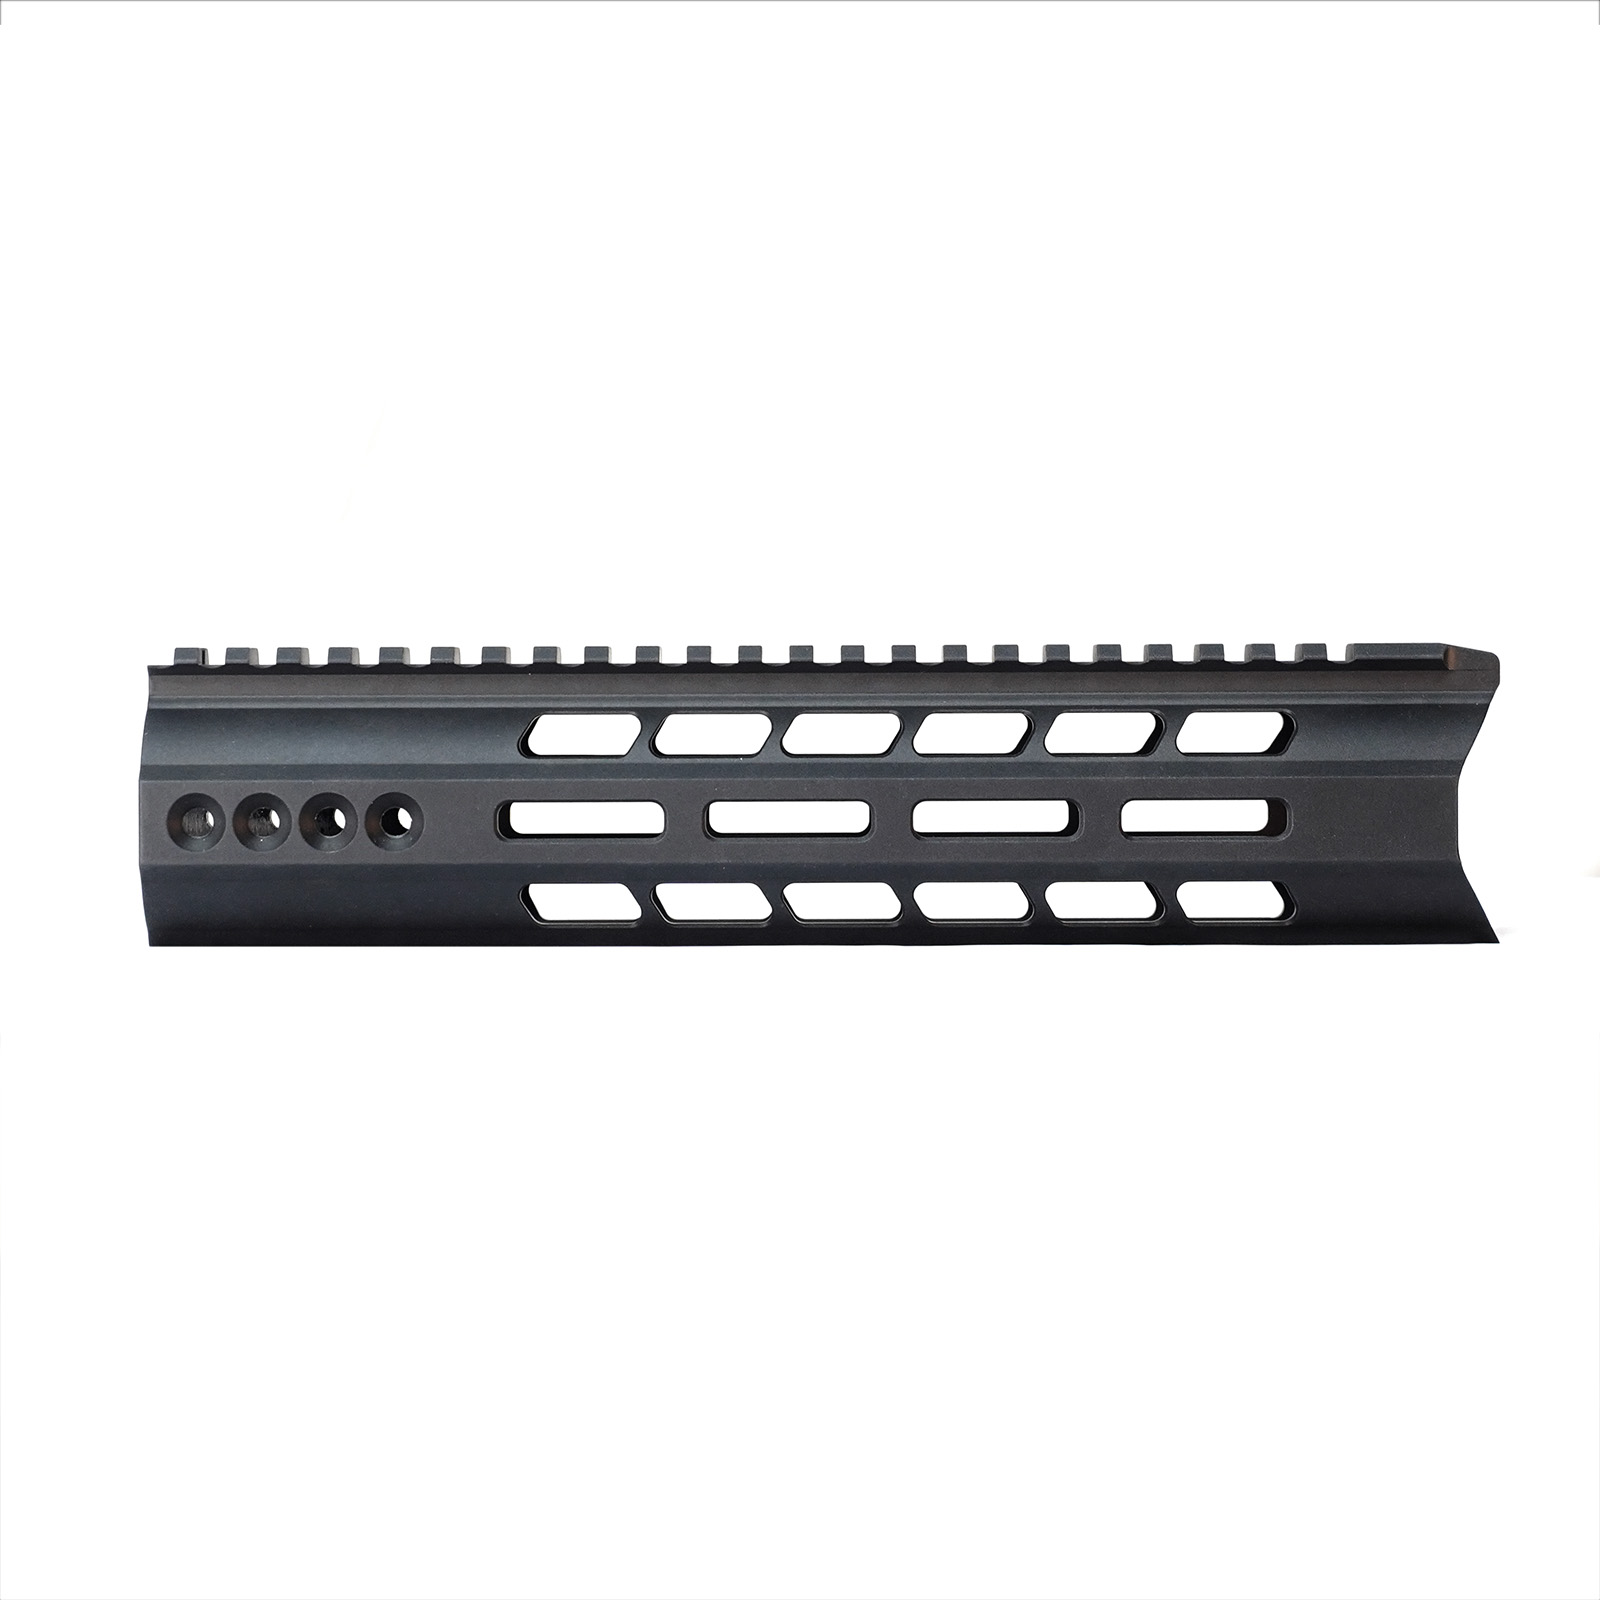
Remove your existing rail by using a 1/8″ hex key to remove the hop adjustment screw and 8 retention screws. Refer to the Owner’s Manual or Disassembly Guide Video for detailed instructions. Be sure not to lose your hop nub when removing the rail.
You can re-use the hop-adjustment spring and detent from your existing rail or use the spring and detent that came with your new rail. The spring should be cut a length of approximately 1/2″ (13mm) if it hasn’t been already. The spring is installed first, followed by the detent.
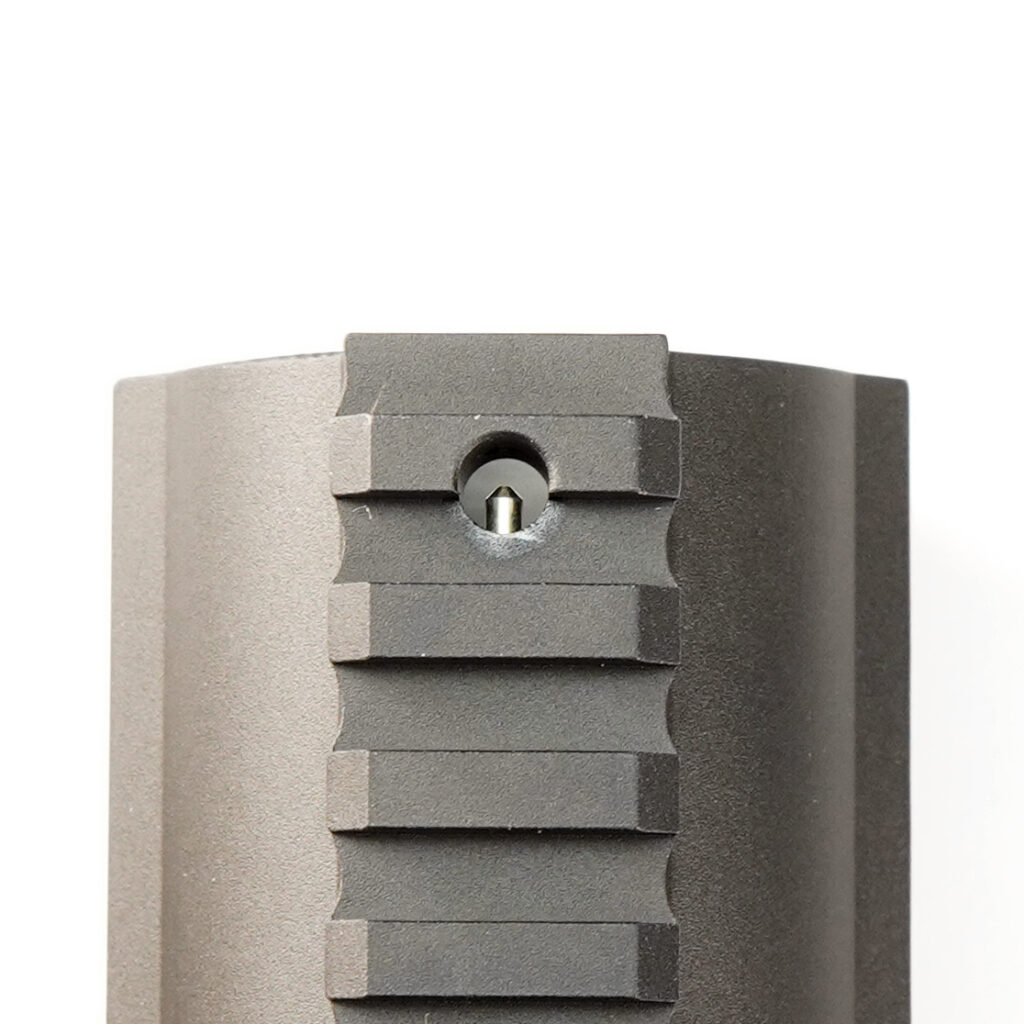
Install spring first, then detent into hole in end of rail.
Half of detent should be visible when installed.
Slide your new rail onto the Gen-12 and reinstall the hop nub (oriented vertically) and hop adjustment screw. Ensure the hop adjustment is engaging the spring and detent and clicking when turned. Secure the rail with the 8 retention screws using a 1/8” hex key. Fully tighten the bushing.
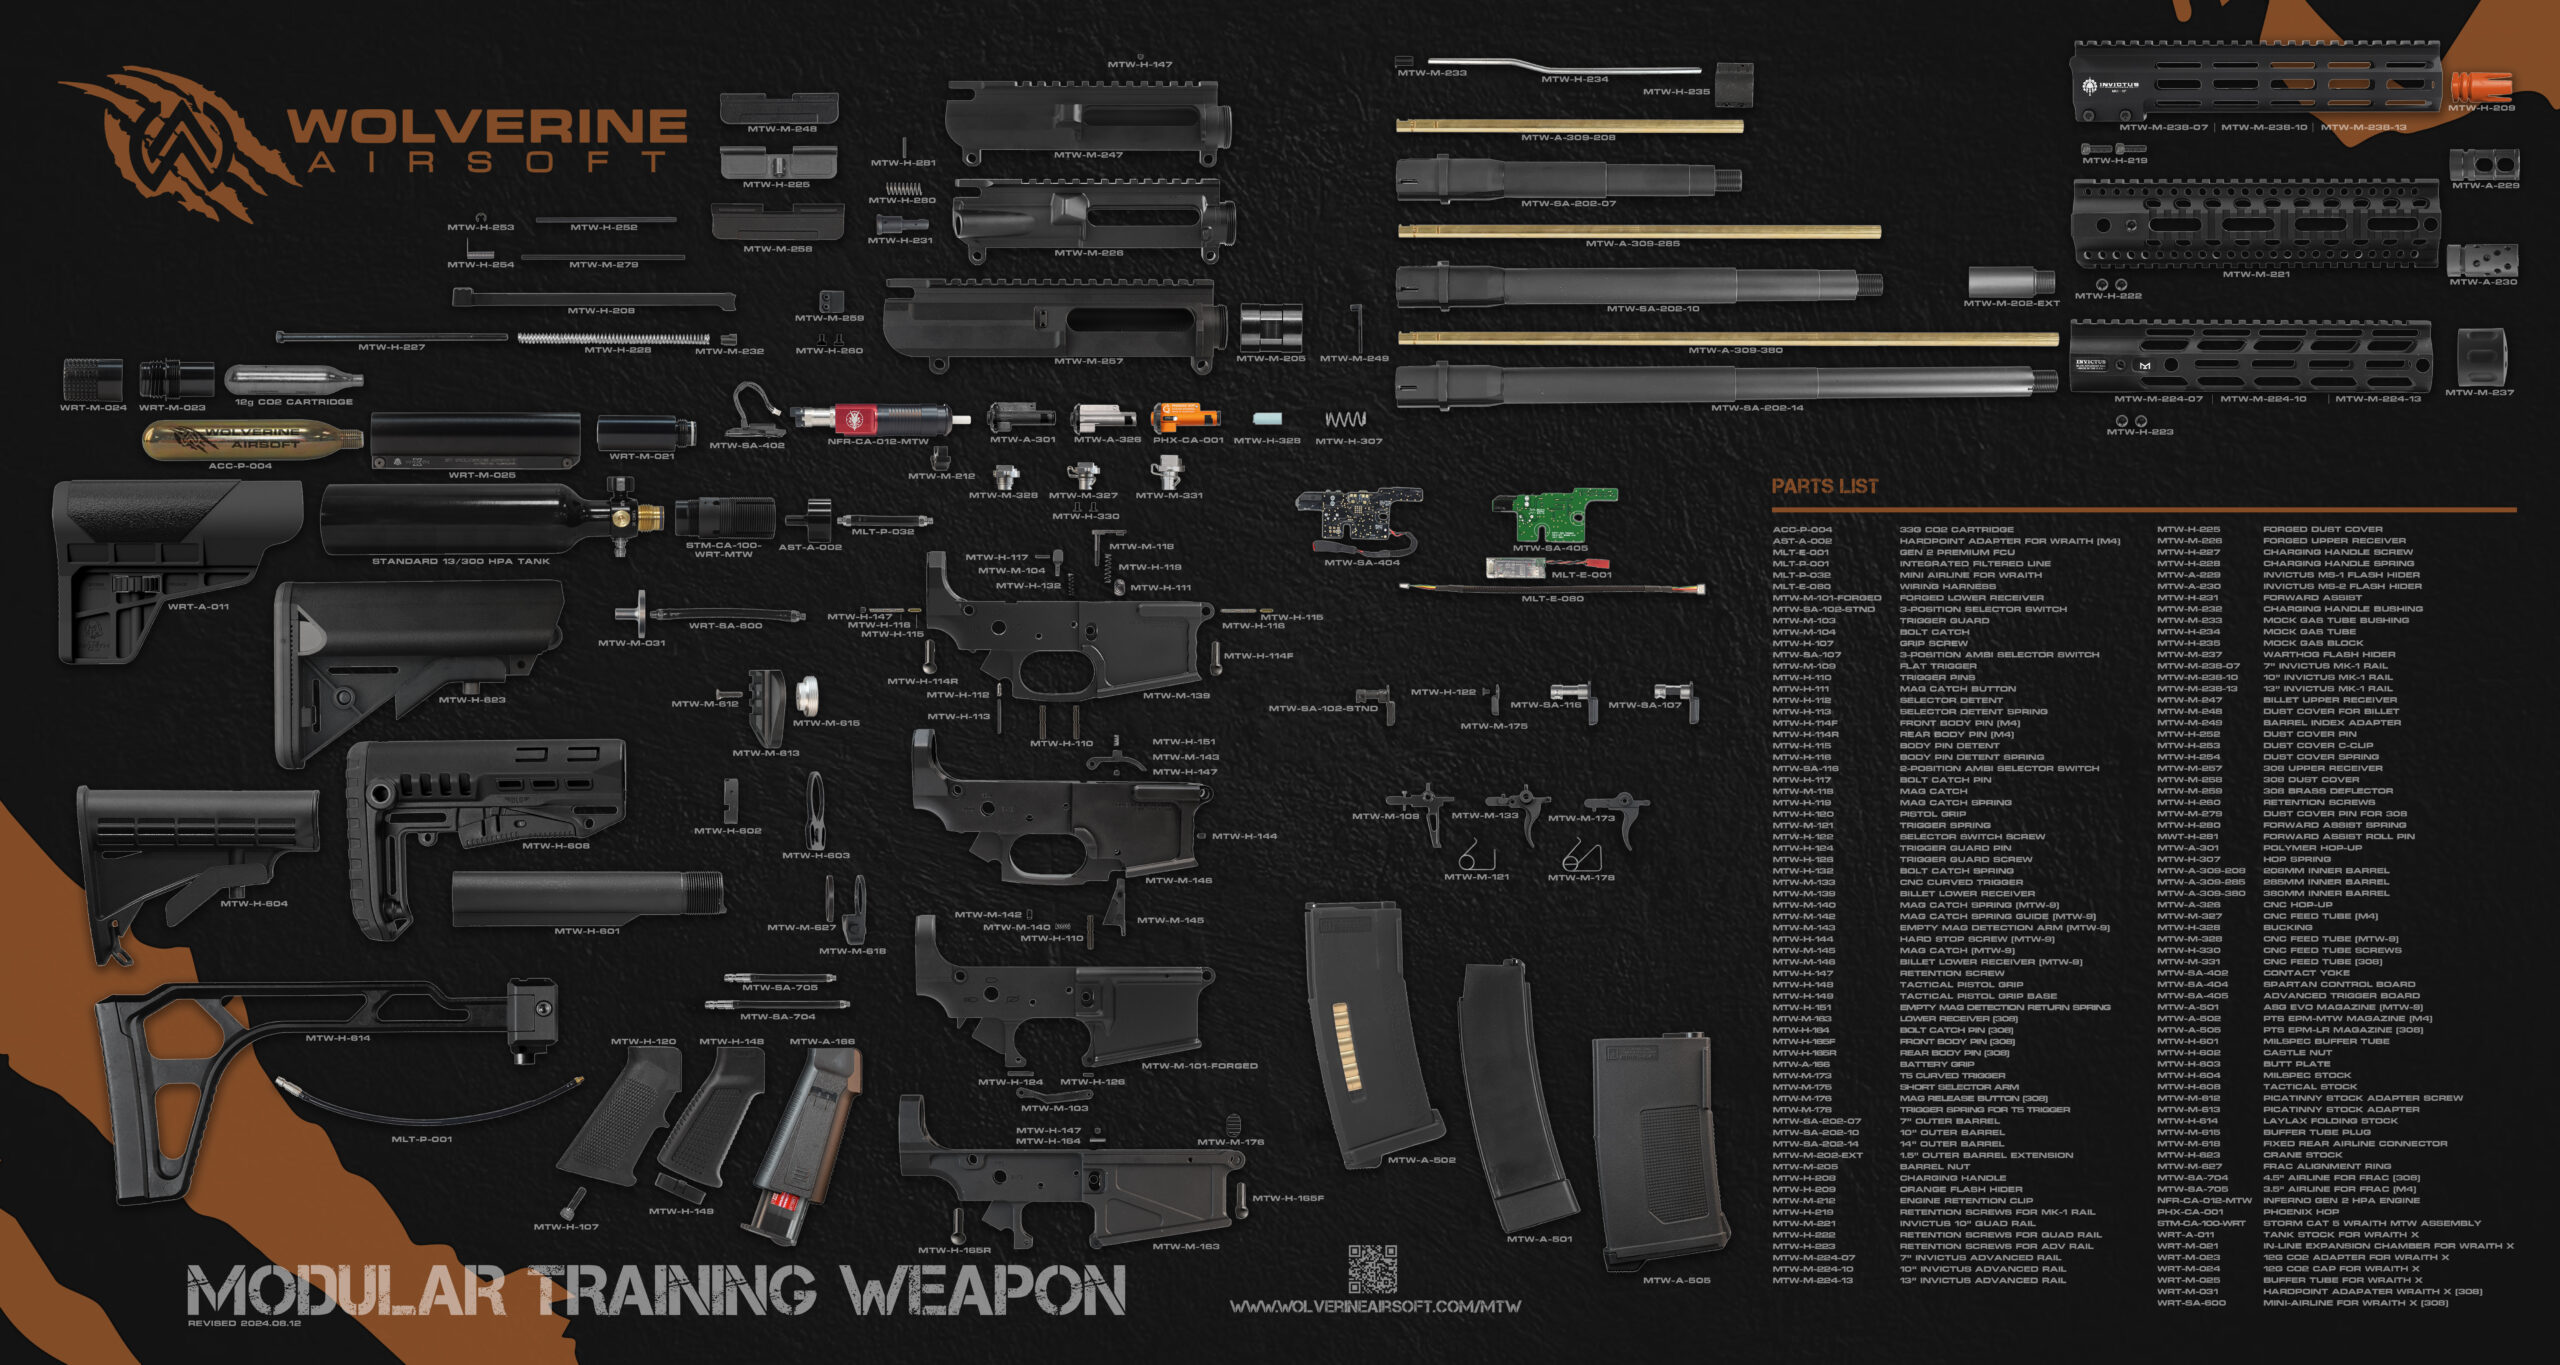
The MTW is designed to be a modular platform with highly interchangeable parts within the MTW-Spec family, with real steel firearms, and with AEGs when possible. The chart below can help you answer compatibility questions among different components and MTW series.
MTW-308s and MTW Shotgun shipped with a standard MTW Spartan Electronics Control Board included dedicated 308/Shotgun firmware. This firmware includes two configurations: “308 Mode” and “Shotgun Mode.”
These modes should be set correctly from the factory, but it is possible to change the mode accidentally to the incorrect mode for your build.
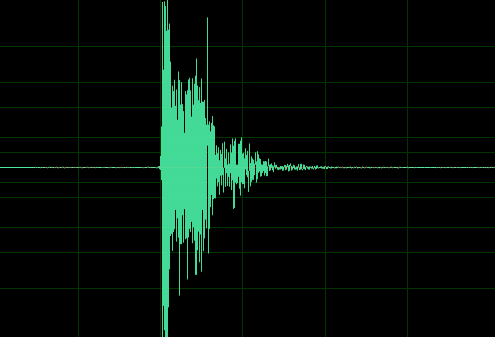
Shotgun Mode features additional dwell (a longer release of air) only suitable for shotgun builds. You can tell which configuration your MTW is set to by listening to the sound of the dwell. See the examples below.
308 Mode
Shotgun Mode
The configuration can be toggled between the two modes by holding down the trigger for at least 15 seconds. The MTW may fire or make a small click to let you know the mode has been changed.
NOTE: The MTW may also fire after 5 seconds, indicating the select fire mode has been changed. Continue to hold the trigger until the 15-second mark and the gun fires or clicks. If you desired, you can then set your fire mode as desired by holding down the trigger for 5 seconds. See this article for more information: https://www.wolverineairsoft.com/knowledgebase/mtw-spartan-electronics-for-mtw-spec-fire-modes/