MTW-308s and MTW Shotgun shipped with a standard MTW Spartan Electronics Control Board included dedicated 308/Shotgun firmware. This firmware includes two configurations: “308 Mode” and “Shotgun Mode.”
These modes should be set correctly from the factory, but it is possible to change the mode accidentally to the incorrect mode for your build.
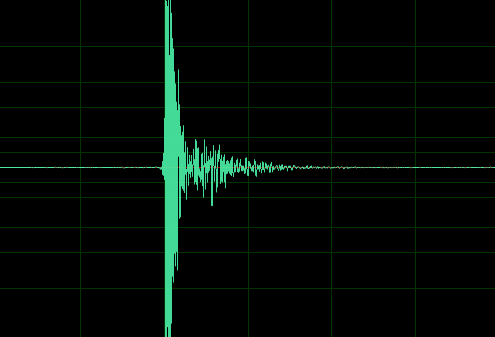
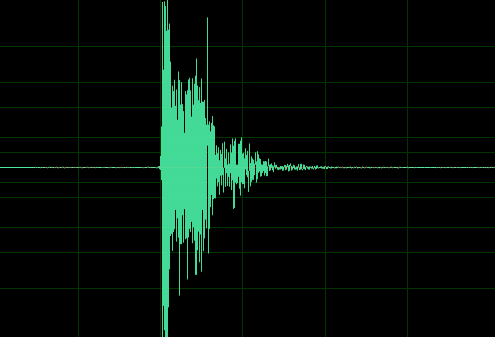
Shotgun Mode features additional dwell (a longer release of air) only suitable for shotgun builds. You can tell which configuration your MTW is set to by listening to the sound of the dwell. See the examples below.
308 Mode
Shotgun Mode
The configuration can be toggled between the two modes by holding down the trigger for at least 15 seconds. The MTW may fire or make a small click to let you know the mode has been changed.
NOTE: The MTW may also fire after 5 seconds, indicating the select fire mode has been changed. Continue to hold the trigger until the 15-second mark and the gun fires or clicks. If you desired, you can then set your fire mode as desired by holding down the trigger for 5 seconds. See this article for more information: https://www.wolverineairsoft.com/knowledgebase/mtw-spartan-electronics-for-mtw-spec-fire-modes/
The Spartan Electronics board can be cycled through several different fire modes as listed below. To advance to the next fire mode, set your gun to semi mode and hold the trigger. After 5 seconds (MTW version) or 10 seconds (AEG Version), the board will advance to the next setting.
MTW Fire Mode Select Demonstration. See the instructions below for AEGs.
MTW (Hold 5 seconds to change modes) • Semi / Full Auto (Default in US) • Semi / 3-Round Burst • Semi / 2-Round Burst • Semi / Semi (Default in UK) • 2-Round Burst / Full Auto
AEG (Hold 10 seconds to change modes) • Semi / Full Auto (Default in US) • Semi / 3-Round Burst • Semi / Semi (Default in UK)
*Boards sold in Germany are locked in Semi / Semi mode.
If the optical select-fire sensor on the MTW Spartan Electronics Control Board is giving inconsistent results, it may be necessary to clean the contacts on the board. After removing the electronics from your MTW, remove the electrical tape from the back of the board to reveal the sensor contacts. Clean them thoroughly with 70% or better isopropyl alcohol. After allowing the contacts to dry, re-apply the electrical tape and reinstall the board in your MTW.
For instructions on removing/installing the control board, see this video.