HPA Tank Lubrication
Disassembling an MTW or Article of Heresy with an installed Tank Grip requires disconnecting the airline from the STORM Category 5 regulator first.
First, disassemble the Tank Grip by removing the 8 screws with a 2mm hex key.
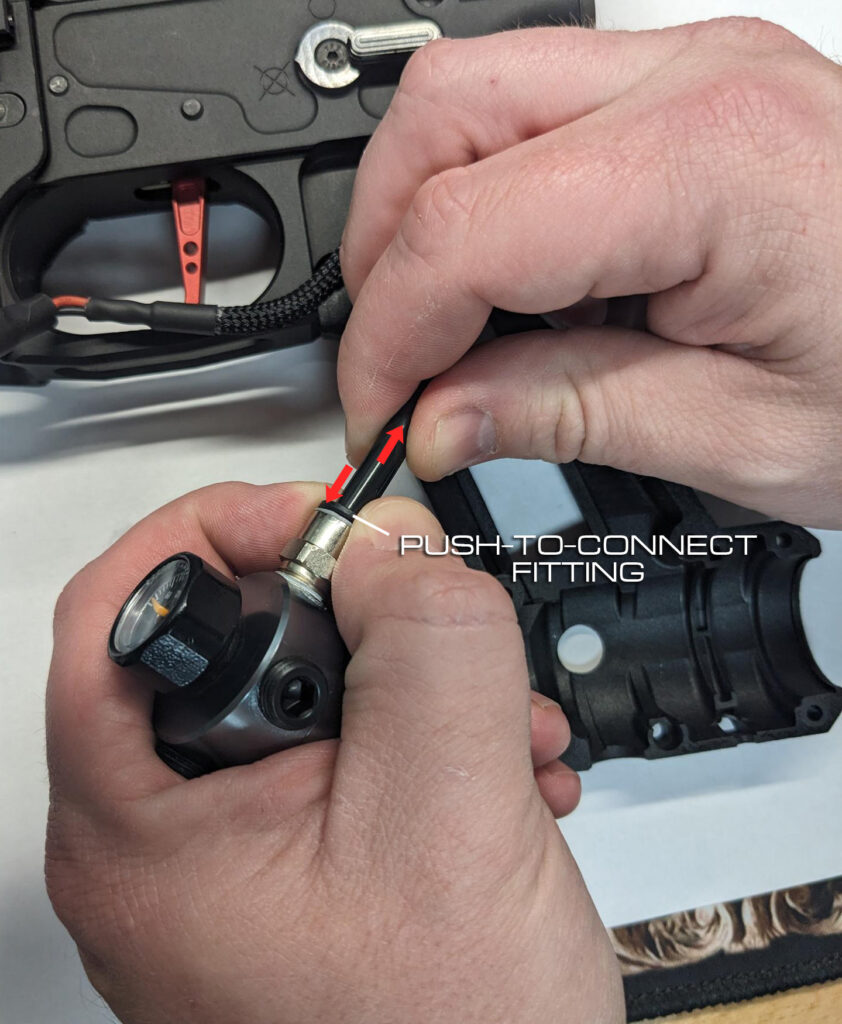
Once you can access the regulator, press and hold down on the push-to-connect fitting while pulling upwards on the airline. Then continue to separate the upper and lower receiver as normal.
When closing the receiver set, press and hold down on the push-to-connect fitting and insert the airline into the connector until it stops.