Troubleshooting Alignment Issues (Video)

Rich explains the best way to check and correct alignment issues on an M4.

Video transcript: hey guys this is rich and today on what the tech we’re gonna take a look at alignment what it is how do you go about checking it alignment one of those bug buzzwords anybody that’s been around HPA for any length of time is heard but a lot of people don’t really understand it or don’t really feel comfortable with checking it and adjusting it so we’re going to take a look at how we check alignment and some ideas on how you go about fixing it so let’s jump right in alright so the way people have been checking alignment for quite a while and this is the way we suggested quite a while ago is basically this is your barrel this is your hop-up basically shining a light up the feed tube and then visually looking down the barrel and you can see generally when you’re looking down there where you’re gonna be able to see is you’re gonna be able to see the barrel you’re gonna be able to see the nozzle as well and then now the nozzle will either look nice and centered like it should or well look off to one side or high above something like that and you can see where you need to adjust it so let’s talk about why that method is not wrong per se but I’m not always completely accurate what ends up happening sometimes is the hop-up fits into the front of the gearbox you can actually get into situations where if if that fit between the hop-up and the gearbox is tight for instance again here’s our barrel it will be held in place by the gearbox here’s our gearbox over here and it’ll it’ll need to line up with the gearbox over here but that line is not straight with the barrel so but it gets forced into that position then what you end up with is one of two things either you bend the barrel a little bit to make it fit in position or the parts within the hop-up themselves shift a little bit with respect to each other so that it can line up but either way the end result is when you’re looking down because it’s still held Center the hop-up itself is held centered on the gearbox real closely it’ll still look like it’s centered it’ll still look good in your eye isn’t gonna pick up on the slight curve in the barrel or the parts being being shifted a little bit sometimes it’ll it’ll look good and then you’ll take it apart and you’ll find that the nozzle maybe has some marks like it’s rubbing on the hop-up or or something along those lines or it’s still not shooting real well but it looks good so we’re gonna talk about an alternative method for how to how to check the alignment that works a lot better so what you’re gonna need is your gun and a donor barrel and that’s about it you need those two things and maybe you’re gonna want to do it in a pretty well lit area so you can see clearly but other than that don’t need a flashlight don’t need anything like that so let’s talk about how to do this okay so what we’re gonna do is going to take our barrel as you can see we’ve got the system installed in the gearbox and we have removed the hop-up and barrel from the gun you want a barrel with the hop-up off and I’m gonna do is I’m going to slide the barrel down the inner barrel if you watch be able to see it come out right there and all I’m gonna do is this lets me visually check whether it’s lined up you can see if the nozzle actually lines up correctly from the side and you can look from the bottom and see it lines up well from the bottom now there may be some guns that this is doesn’t work real well on but for the most part especially any stage damn for this is by far the best way to go about checking and you can see where you need to adjust it if you need to adjust it alright so you found that you’ve checked your alignment and you found that it’s off for some reason we can’t cover every single gun and how you would go about fixing it we can’t even really cover every single variant because there’s a lot of them but give you some general ideas specifically for m4 style platforms as far as how you might go about adjusting it put the receiver apart here there’s basically two ways that the that the alignment can be off it can be off vertically it can be off so side to side of the two generally side to side is a little easier and more reliable to fix generally basically what you’re gonna do is you need to space the gearbox on the two sides here between the receiver and the gearbox generally we put just a drill and put in some set screws on each side and that allows you to adjust it so right down in this location I put a screw in on that side I’m gonna screw down in on that side and then you can adjust it back and forth and you can get it centered right where you want and once you get it you can lock tight those screws in place and they’ll never move and it reliably goes back together the same way every time vertically is a little more a little more tricky if that’s off sometimes because in theory this shouldn’t this gearbox shouldn’t be able to move vertically in theory it’s held in place by these two pins however sometimes those pins either are not in the right location or they are loose so the gearbox has some slop in it one way or the other if it’s off vertically generally what we will do is we’ll remove this front pin for just remove that guy and and just try to adjust the vertical with the back pin in place the the back body pin there in place on a lot of guns the reason that most most often when we see the alignment off vertically what we see is it’s too high the nozzle is sitting up too high in the receiver usually this is because the buffer tube is going into the back of the gearbox this one’s been modified you can see so that’s not an issue on on this this platform at this point but it’s going into the back of the gearbox with the buffer tube adapter and that’s getting tightened down and that’s pivoting the gearbox around at this point and it’s pulling it rotating the gearbox backwards or counterclockwise which pulls the nozzle up if that’s what you’re finding what you’re going to want to do is loosen the buffer tube up and tighten down the grip screws first because those grips screws are pulling on an angle like this and if we remove this pin now when they’re pulling they’re pulling the front of the gearbox down lower so you’re gonna if it’s too high which is by far the most common thing we see with alignment on M4s just go ahead and tighten the grip down first maybe tighten it down a little bit at a time and you can go back and check the alignment as you go put the top back upper receiver back on and check it a couple times and then then Snug down your your buffer tube screw and don’t just go nuts on that Snug it down as much as it needs to be but don’t don’t crank it down super tight because you might might pull it back up usually that those methods will will get you lined up sometimes in more extreme cases you may find that it just the gearbox can’t sit in the right position in the lower receiver this usually is because people are using a mismatched gearbox and receiver they’re using a different brand gearbox than the receiver they’re using we don’t really have time to go into how to fix that issue right now but generally we just recommend use the same brand preferably the same gearbox that came with the gun but at least the same brand gearbox so that you don’t run into that type of a situation that’s generally how we go about fixing basic alignment alignment issues I highly recommend using this method running the barrel down visually check how it lines up with the nozzle because it’s going to make it makes it much easier to pick up on misalignment then the way it’s been done in the past thanks for watching guys I hope this was helpful to you if you have any questions or comments be sure to leave them in the comment section below and we look forward to seeing you guys out on the field

Solenoid Maintenance

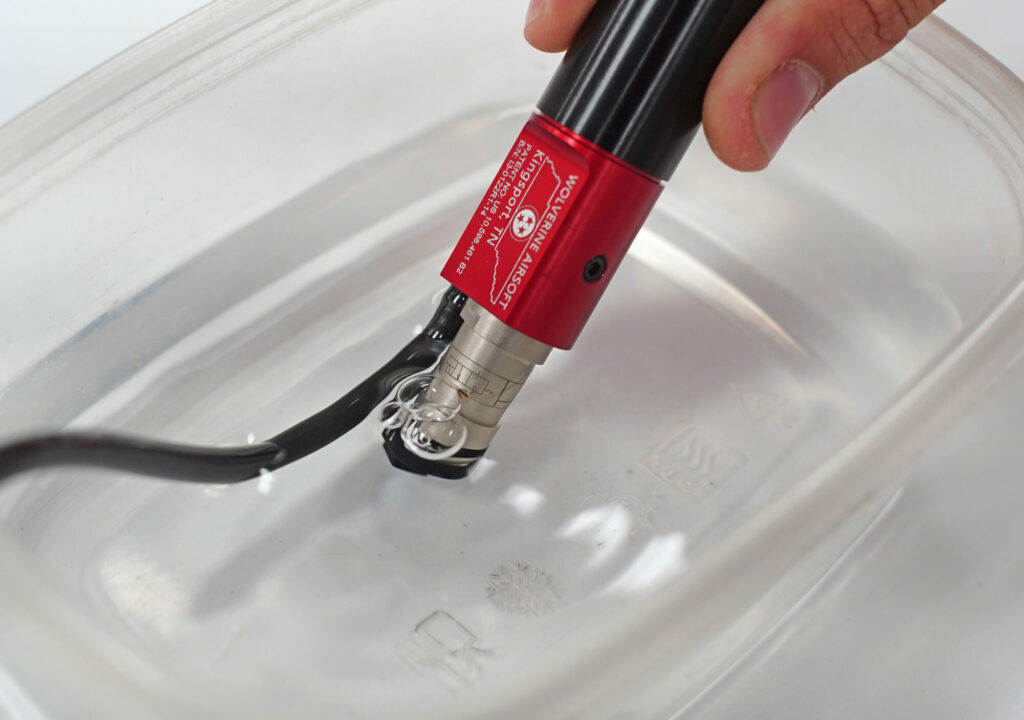
Wolverine Airsoft engines including the INFERNO, HYDRA, REAPER and BOLT all use either a 214 or 314 solenoid. In the event that dust or debris makes its way into the solenoid, it may become necessary to clean it.

Please see our Solenoid Maintenance Guide for detailed instructions on how to disassemble, maintain and reassemble your solenoid.

Solenoid
Maintenance Guide
www.wolverineairsoft.com
WOLVERINE AIRSOFT
Page 2
www.wolverineairsoft.com
Solenoid Maintenance
Wolverine Airsoft engines including the INFERNO,
HYDRA, REAPER and BOLT all use either a 214
or 314 solenoid. In the event that dust or debris
makes its way into the solenoid, it may become
necessary to clean it.
You will need:
• Compressed Air
• 2.5mm Allen Key
or 3mm square
bit for solenoids
with plastic caps
Begin by removing your solenoid
from your Wolverine Airsoft
engine by unscrewing it counter-clockwise from the engine.
The HYDRA will require the
additional step of removing the
retention clip from around the
valve housing.
MAC Valves 214, 2-Way Solenoid
MAC Valves 314, 3-Way Solenoid
Plastic Cap
(3mm
square bit)
Brass Cap
(2.5mm
allen key)
Page 3
www.wolverineairsoft.com
Use a 2.5mm Allen key or 3mm
square bit to remove the cap
from the solenoid by rotating
counterclockwise.
Use a blunt instrument to open
the valve by pushing on the piston in the center hole as shown
below. This will open the valve
for cleaning.
Replace the brass end cap
using the 2.5mm Allen key or
3mm square bit.
While holding the valve open
use compressed air to remove
the debris from the valve. It
is important to not scratch
the seal. The debris will usually
be found just behind the front
O-ring as indicated in the image.
Finally, reinstall the solenoid in
your engine and hand-tighten it.
www.wolverineairsoft.com
Need professional help?
To find a retailer close to you visit:
www.wolverineairsoft.com/dealers

V2.5 Gearbox Modification

The issue with installing in an SR25 gearbox (V2.5 gearbox) is the extra long cylinder head used in the gearbox. Due to this there is a longer tappet plate which interferes with the unit (SMP, Inferno, or HYDRA) sitting as far forward in the gearbox as is necessary. To solve this issue you will need to cut the plate down to allow the unit to sit forward. For detailed instructions, please see the V2.5 Gearbox Modification Guide.