

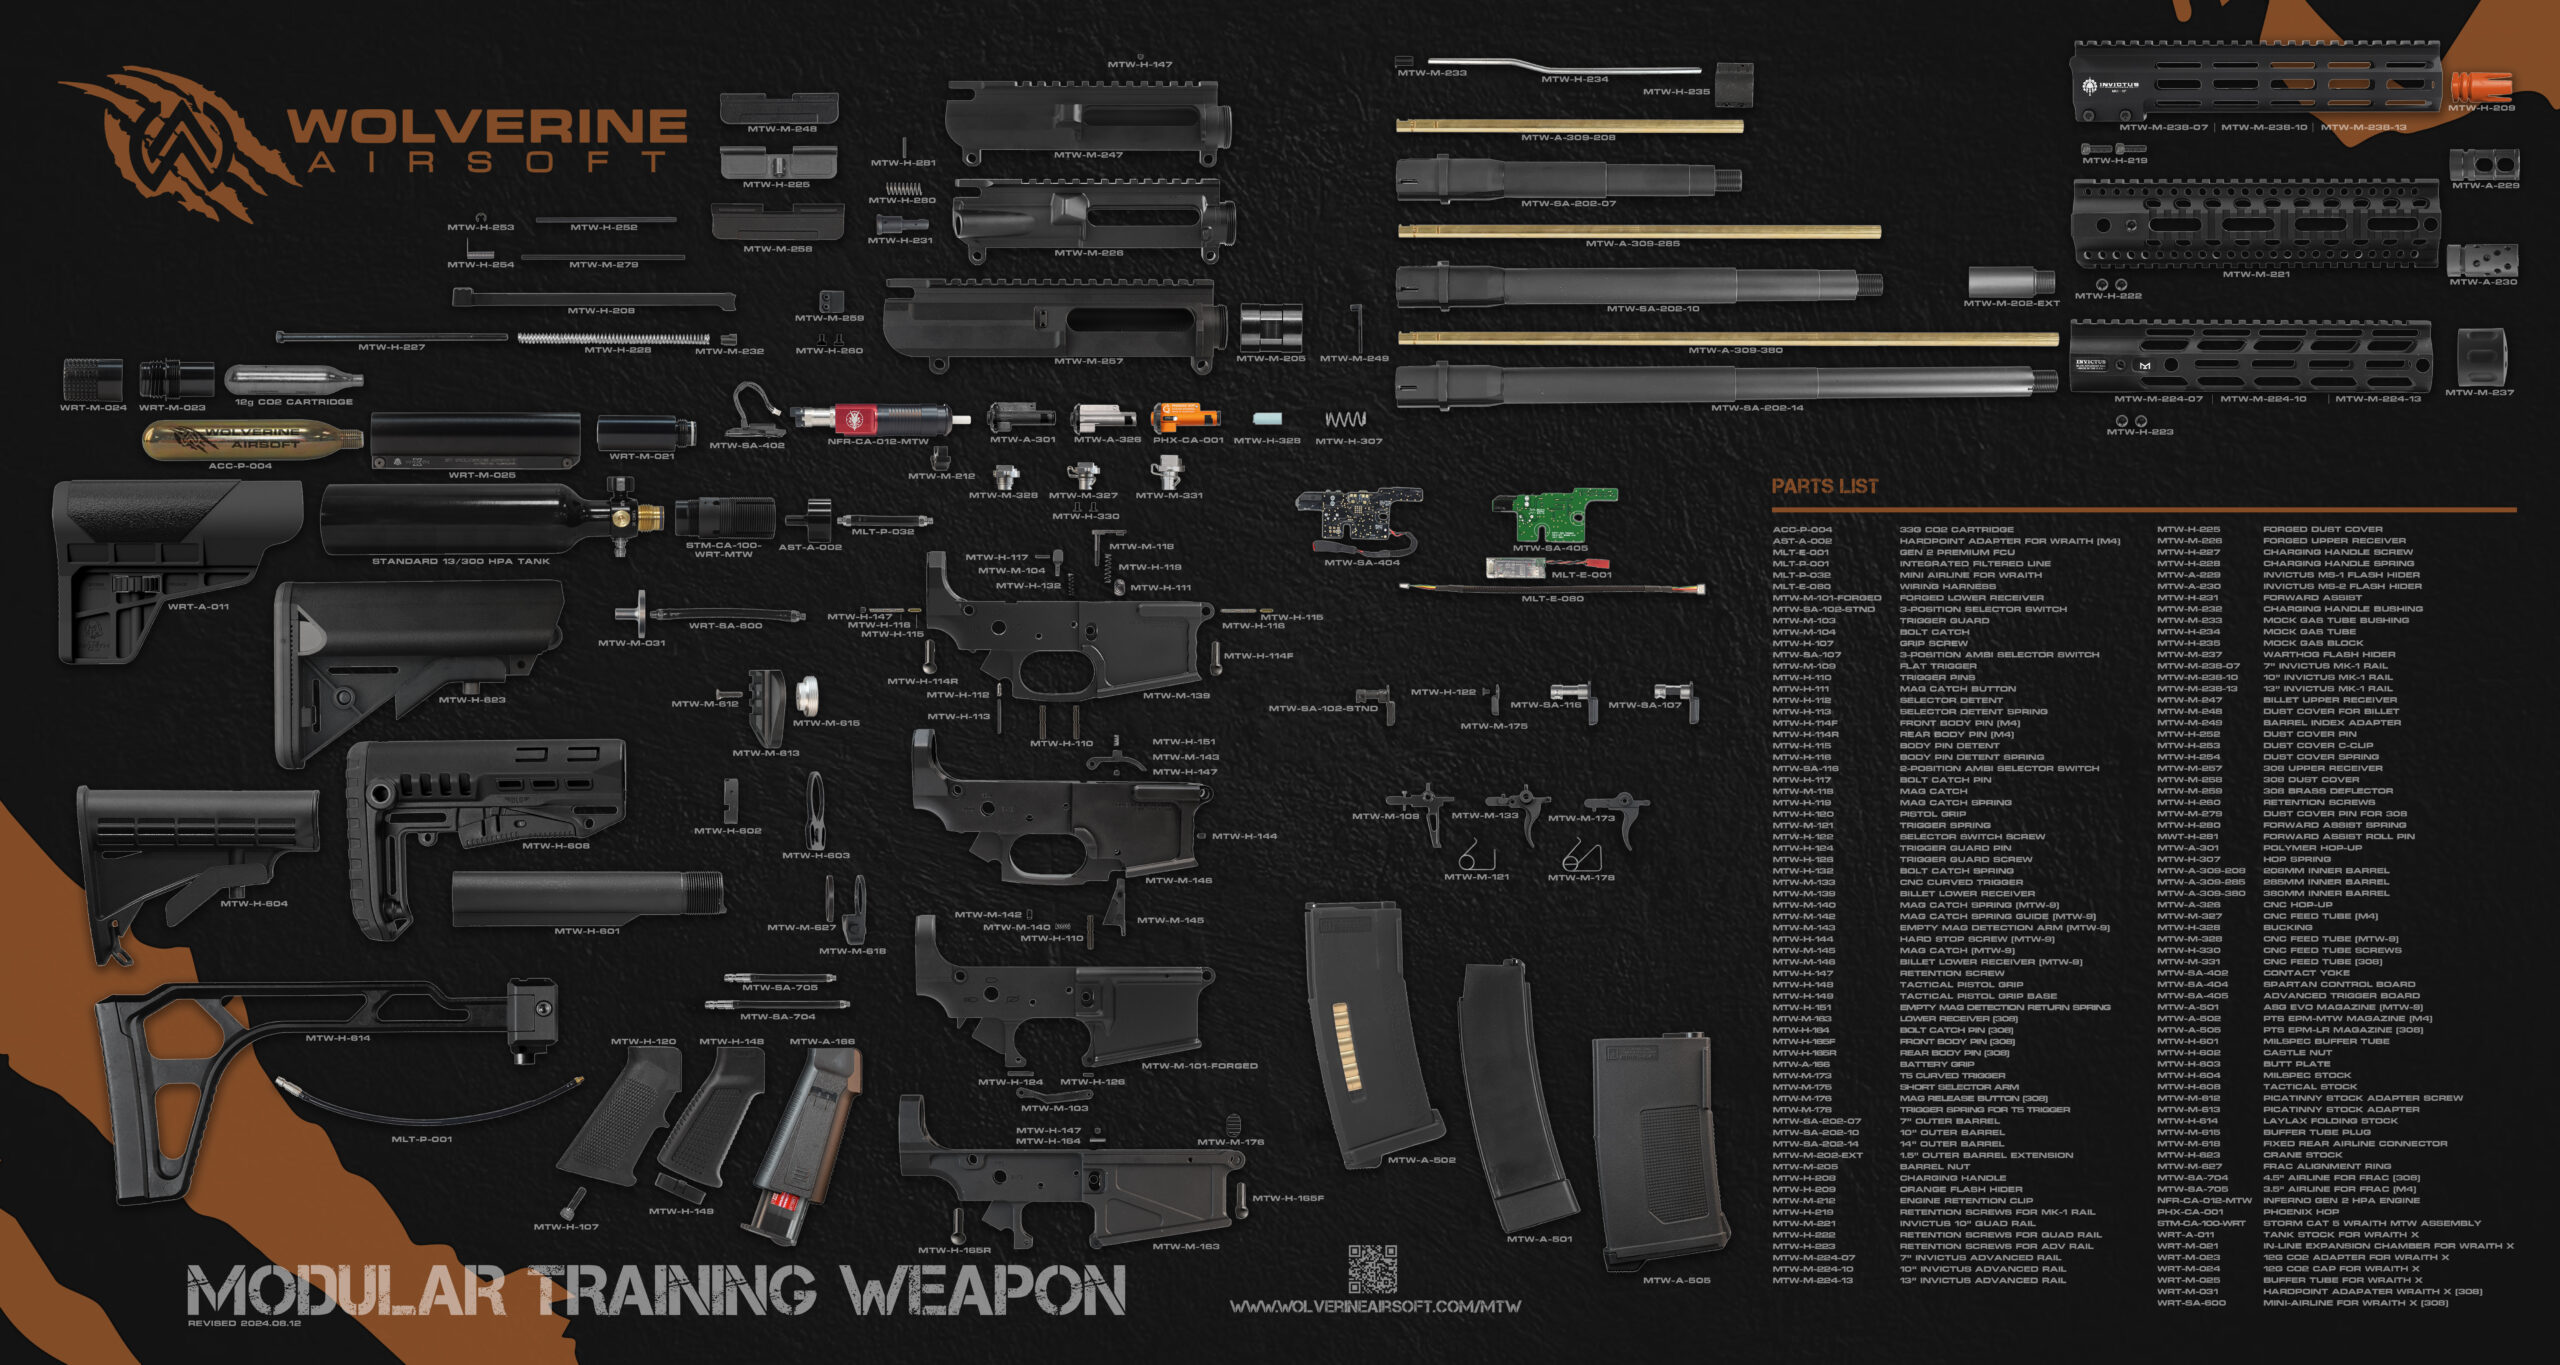
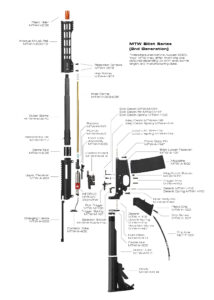
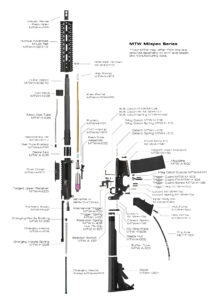
Owner’s Manual for BOLT M
For detailed instruction on disassembling, lubricating or replacing O-Rings and reassembling your Legacy WRAITH CO2 Stock, please see the WRAITH CO2 Stock Maintenance Guide.
For the WRAITH X, please see the WRAITH X Owner’s Manual.
If the optical select-fire sensor on the MTW Spartan Electronics Control Board is giving inconsistent results, it may be necessary to clean the contacts on the board. After removing the electronics from your MTW, remove the electrical tape from the back of the board to reveal the sensor contacts. Clean them thoroughly with 70% or better isopropyl alcohol. After allowing the contacts to dry, re-apply the electrical tape and reinstall the board in your MTW.
For instructions on removing/installing the control board, see this video.
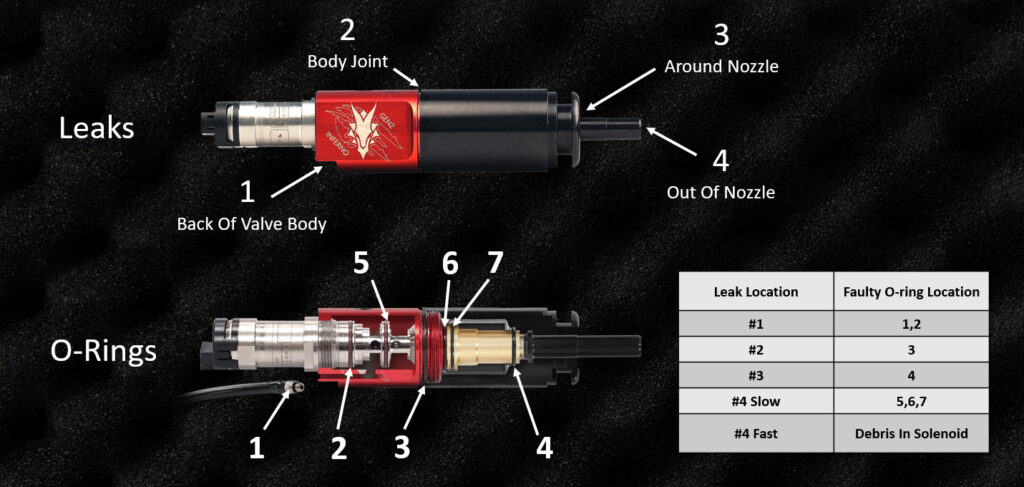
If your INFERNO Gen 2 is leaking, use this diagram to determine which O-ring may be faulty. For example, if your engine is leaking from around the nozzle, you should check the location and condition of O-ring #4.
For instructions in replacing an O-ring, please see the INFERNO Gen 2 Owner’s Manual.
If your INFERNO Gen 2 is leaking, use this diagram to determine which O-ring may be faulty. For example, if your engine is leaking from around the nozzle, you should check the location and condition of O-ring #4.
For instructions in replacing an O-ring, please see the INFERNO Gen 2 Owner’s Manual.
The cylinder plugs are part of the manufacturing process and are not adjustable or removable. Never attempt to remove or adjust the cylinder plugs. Doing so will cause leaking and engine malfunction. Already done it? Follow these steps…
See also: Solenoid Leaks